Provider Portal User’s Guide
Managing User Access Requests – Administrators Only
The following provides Step-By-Step instructions for performing user access reviews.
|
|
Log in to the Provider Portal at |

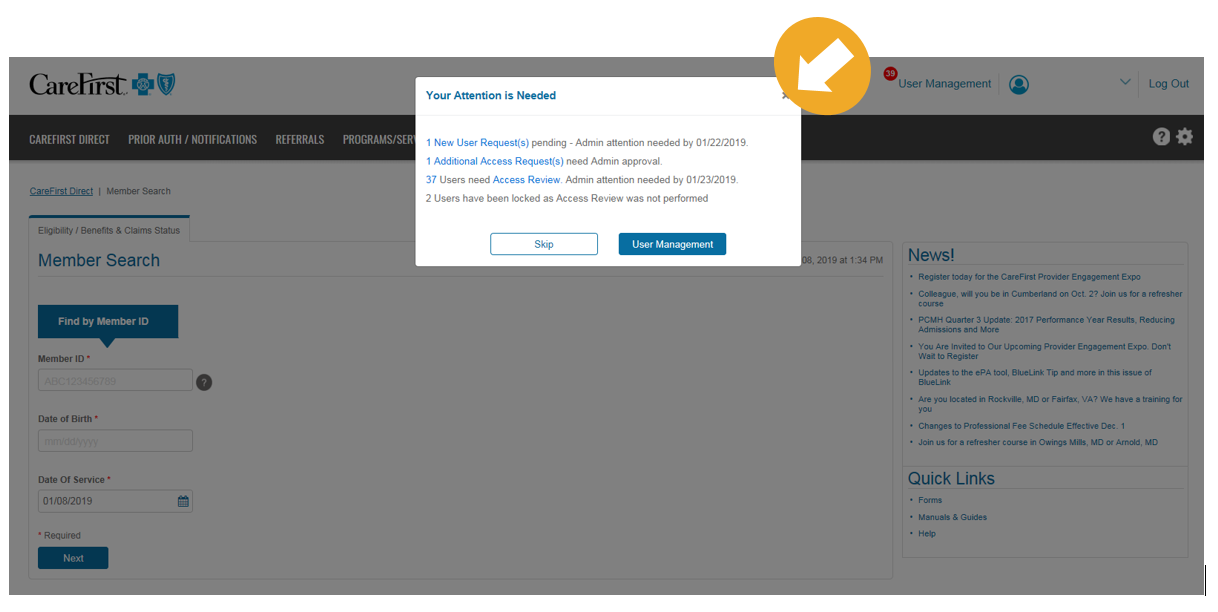 |
Upon log in, a 'Your Attention is Needed' popup window will display, notifying when there are User Access Reviews that need to be completed. This window will show: - The New User Requests that are pending |
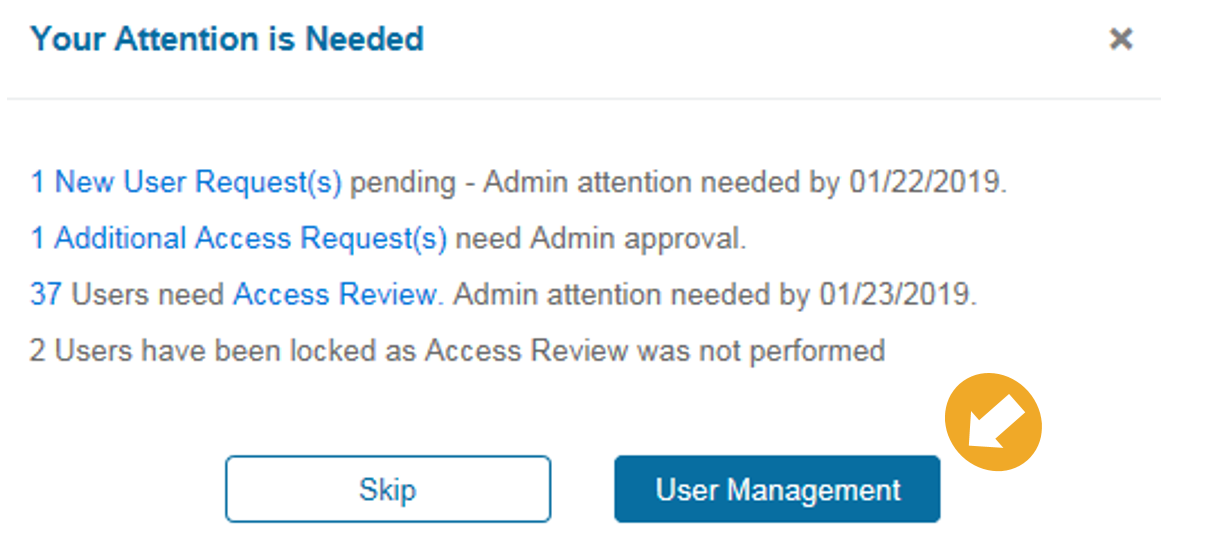 |
If you wish to review the requests later, click ‘Skip’. Important Note: Take note of the dates Admin attention is needed by. If the User Access Requests are not reviewed, the account will be locked and will need to be unlocked by the Administrator. If you wish to view the requests, click on ‘User Management’. |
 |
The items which need action by the Administrator are listed at the top of the User Management page. The Administrator will need to review outstanding: - New User Requests |
New User Requests
 |
A New User Request is generated when a person registers for Provider Portal and desires access within your tax organization. The user will not have access to CareFirst Direct until the Administrator approves them as a new user. When you approve the request, the user will automatically be added to the list of users managed by you. Declining a request must be done one at a time.
To review New User Requests, click on the requests you would like to review by clicking on the corresponding radio button. If you would like to select all requests, click on the radio button in the blue heading. Click ‘Review’. |
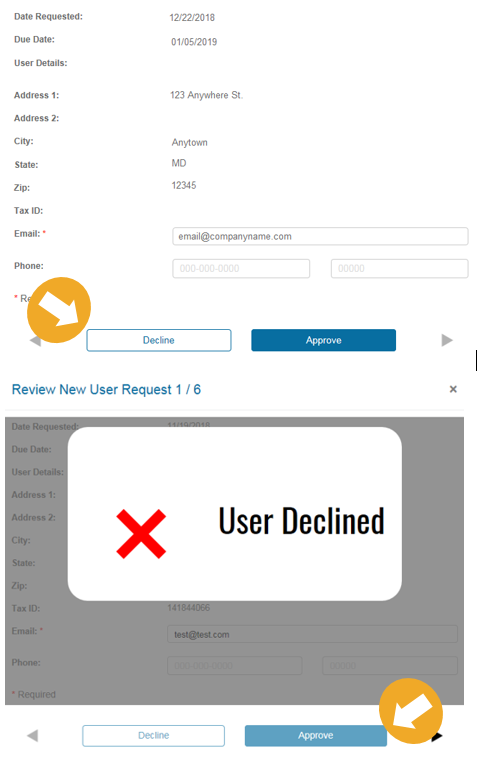 |
If you wish to decline the request, click on ‘Decline’. A confirmation screen will appear that the New User Access Request has been declined. Use the navigational arrows to move to the next request (if applicable). |
 |
If you wish to approve the request, click on ‘Approve’. A confirmation screen will appear that the New User Access Request has been approved. Use the navigational arrows to move to the next request (if applicable). |
Additional Access Requests
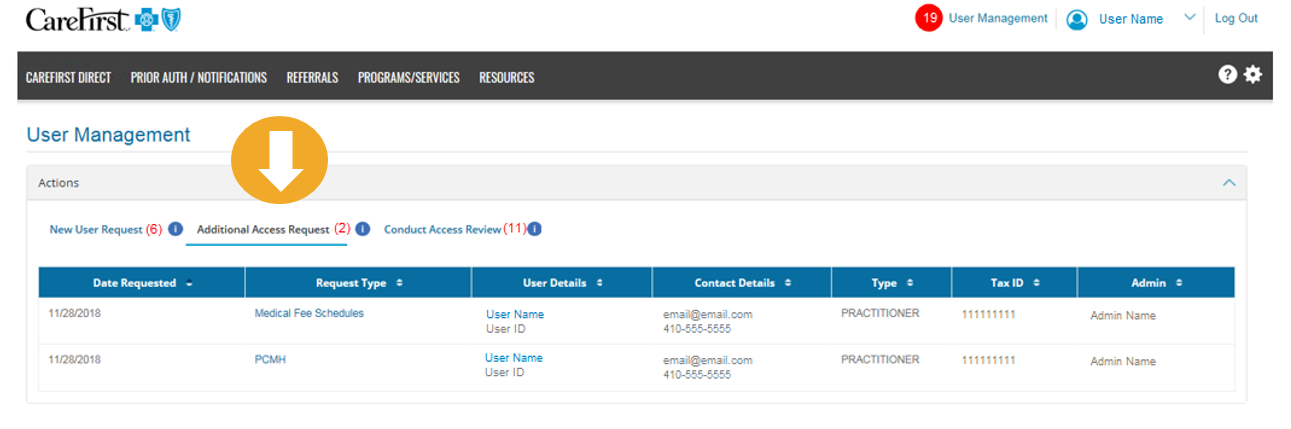 |
Additional Access Requests are requests for access to certain parts of CareFirst Direct that users may need to request access for, such as demographics, PCMH rosters, Fee Schedules and Remittance. To view New User Requests that need approval, click on ‘Additional Access Request’within the Actions section of the User Management Home Page. To review the requests, click on the hyperlink under ‘Request Type’. |
 |
A pop-up will appear with each request. You can approve or decline the request. |
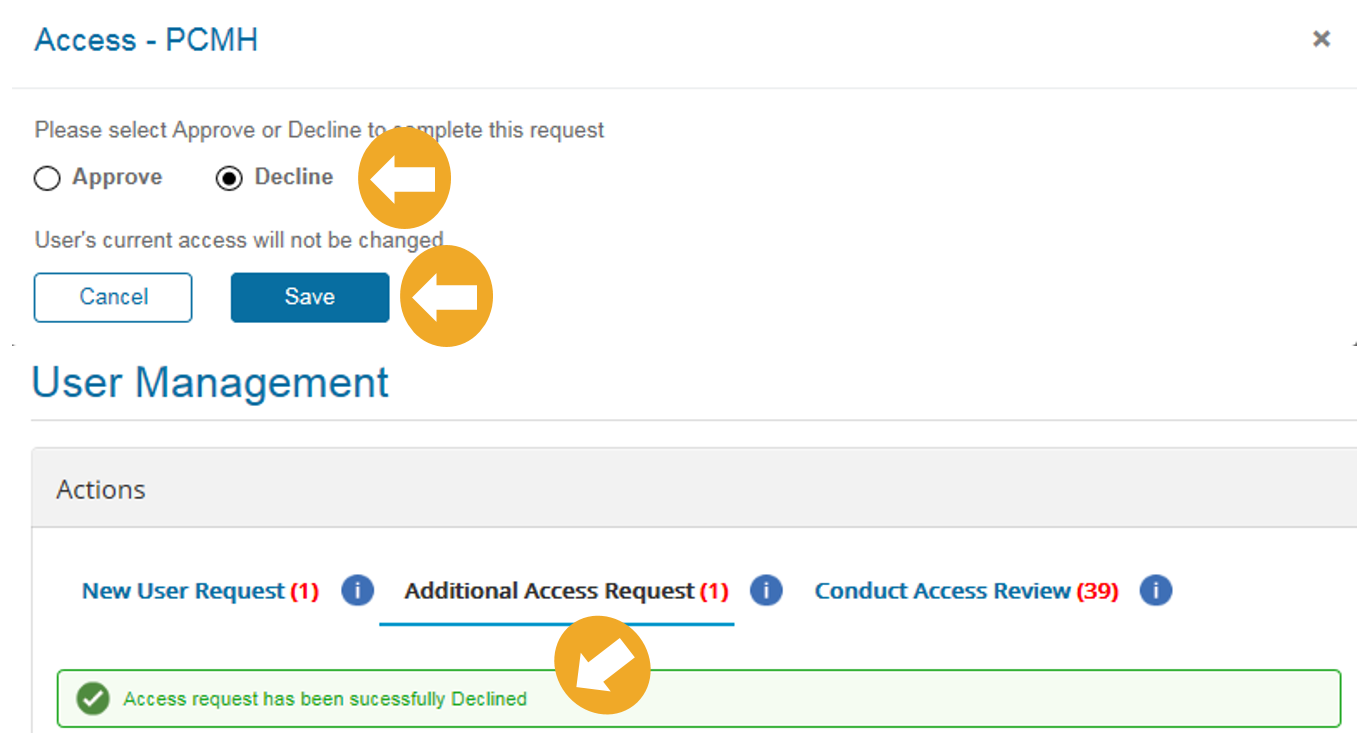 |
If you wish to decline the request, click on the ‘Decline’ radio button and then ‘Save’. A confirmation will indicate the access request has been successfully declined. No changes will be made to the user account.
|
 |
If you wish to approve the request, click on the ‘Approve’ radio button and then ‘Save’. A confirmation will appear indicating the access request has been successfully approved. The access will then be added to the user account. |
Conduct Access Review
 |
Access Reviews will need to be performed annually to ensure users have appropriate access for their job functions. To Conduct Access Reviews click on ‘Conduct Access Review’ within the Actions section of the User Management Home Page. To review users needing annual Access Review, click on the requests you would like to review by clicking on the corresponding radio button. If you would like to select all requests, click on the radio button in the blue heading. Click ‘Review’. |
|
|
Review each user account and access levels. You can add new access to certain features such as Remittance, Fee Schedules, Demographics and User Administration by clicking on ‘Add’. If you would like to remove access to these features, click on ‘Remove Access’. You can also perform additional user management functions, such as locking or terminating an account using the User Management Quick Links. |

|
|
Once all changes have been made, click ‘Verify’ or ‘Decline’. If you do not wish to approve the user, click |
 |

 |
If you click ‘Verify’, you will receive a confirmation that the User has been Verified. You can then use the navigational arrows to move the next User Access Review (if applicable). |
 |
 |
You can also terminate a user’s access from the User Management Home Page, under the Conduct Access Review heading. To terminate, click on the ‘Terminate’ button. |
 |
A window will pop up asking you to confirm the termination. If you do not wish to terminate, click ‘No’ and no changes will be made to the user account. |
 |
If you do wish to terminate, click ‘Yes’. You will receive confirmation of the termination and the user account will no longer exist under the organization. Note: Termination cannot be reversed. Make sure to only terminate those who no longer need CareFirst Direct access. You are only able to select one user at a time to terminate. If multiple users are selected, the termination option will not be available. |
Additional Features of User Management Home Page
 |
Users Accordion When on the User Management Home Page, you can collapse and expand the Users Accordion by clicking on the grey heading bar. |
 |
User Options Under the I would like to… drop down, you are able to select the following options for Users - Assign Admin |
 |
History Accordion The history accordion shows a complete history of the approvals and denials by all Admins within your organization. |
Assigning Admins
 |
When a user is approved or denied access, the user is assigned to the Admin. You can also assign a user to yourself by selecting the ‘Assign Admin’ option from the Users Accordion I would like to dropdown. |
 |
Select the user(s) you would like to assign to yourself by clicking the check box next to their name(s). Click ‘Submit’ and a popup will appear asking you to confirm your selection. |
 |
Verify the users you wish to assign to yourself. If you do not wish to assign these users, click ‘Cancel’ |
 |
If you wish to assign these users to yourself, click ‘Submit’. The user will then be assigned to you. You will receive notification when additional access is requested, as well as when the annual user access review needs to be completed for this user. |